Hi and Welcome to my blog! As part of the "Let's Get Acquainted Blog Hop" by Beth over at Plum and June (see my earlier post) I put together this cute little holiday pillow and wrote a tutorial for it. This is my first tutorial so please be patient. I will try to give directions as clearly as possible. I have used several pics to help clarify directions also.
It is a fun project and pretty quick to make! I hope you enjoy it and if you have any questions, please feel free to email me and I will respond. The pillow is machine pieced with hand stitching and large hand quilting and it finished at 13 1/2 inches by 18 1/2 inches, just perfect to go with the pillows on my sofa!


When I was pondering about what I wanted to make next, I knew I wanted a Christmas project (since I am notoriously behind in my sewing of hand made gifts for Christmas) that way maybe I would have a head start on the Season! A pillow-- I like pillows and find they are pretty versatile and fairly quick to make. Ok, check, it's going to be a pillow project. When thinking about what style, I thought about stars (still thinking about them) but I knew I wanted strips (a bit easier for this first time tutorial I thought) but I wanted some hand stitching also. So I looked around and used this as my inspiration. I would like to Thank Hoffman Fabrics and Linda Ambrosini for the original free design.
I chose to use Aneela Hoey's Cherry Christmas line by Moda. It is such a fun and sweet line and I love the aqua/turquoise color with the pinks and more traditional white, red and grey prints. I also used Kona white and Kona grey.
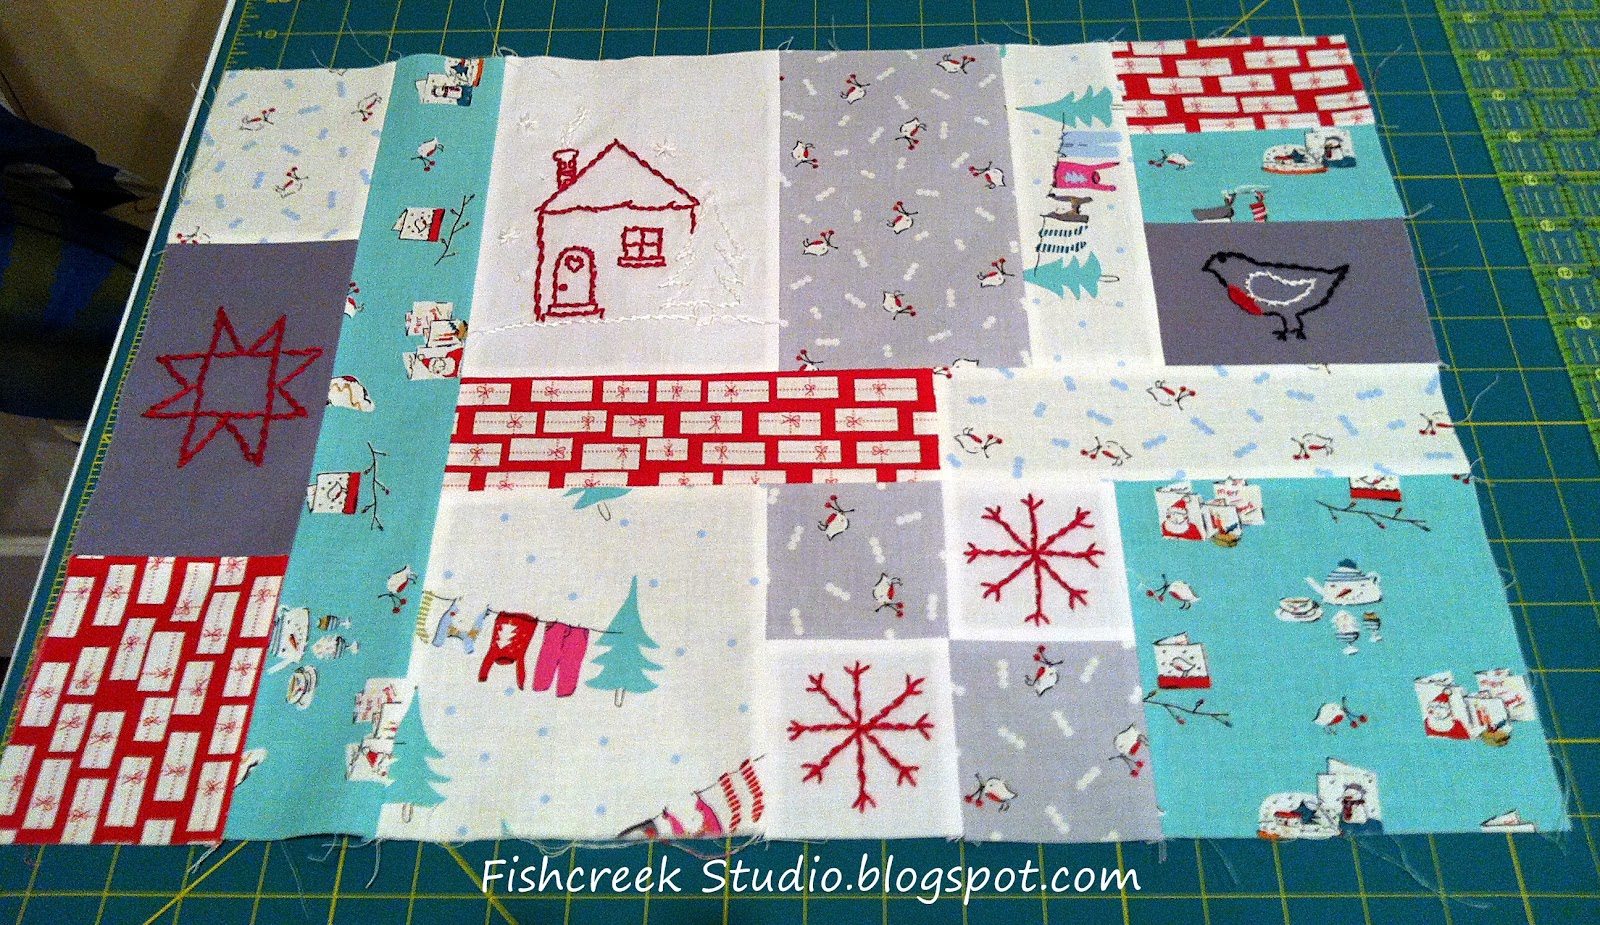
I then decided to add some holiday handstitiching to the large blocks. I kept the bird and tried to adapt it a bit more to the little birds that Aneela has on her fabric - so cute! Next I added a bit of a wonky star, some snowflakes and a cute little house with a pine tree outside. These were drawn free hand on white paper and then later transferred to the fabric by tracing them.
I also decided for ease of piecing and a more uniform look to combine the upper right hand corner squares into one block of 2 1/2 x 4 1/2 in just like the one below it.
 |
| DMC Pearle Cotton Floss #5 ($1.59/skein @ JoAnns) |
So lets get started, here is what you will need:
-5 fat eighths of Christmas/Holiday prints or if you want scraps for back you may use 1/4 yd each
I used: Aneela Hoey Cheery Christmas by Moda in the following prints:
Red Presents 18534, White Birds (didn't get the number), Teal 18531,
White Laundry 18530, Grey Birds 18532
-2 fat eighths of solids for the hands stitched areas
I used: Kona Grey Med 1223, and Kona White
-Backing fabric - I used yardage (vs fat eighth's) and therefore had leftover scraps and just pieced it.
-Cutting mat, ruler, rotary cutter, matching thread, small scissors, tapestry needle (18), thimble if you like
-3 in or 6 in embroidery hoop, Pearle Cotton Thread - #5
I used DMC Black 310, White Blanc, Red 321, Grey Lt 415 (my pic above shows several other that coordinate with my fabric but in the end I wanted a more cohesive color scheme and stuck with the 4 colors listed).
-Polyfill for the pillow stuffing. (Mine finished at approx 14 in x 18in which is an odd size for a pillow form.)
All seams are 1/4 inch. On the Cutting Diagram (see pic below or see original at Hoffman Fabrics link above) all dimensions are cut sizes. You may want to cut your solid backgrounds where you will be hand stitching larger so that you may hand stitch them before they are cut down and pieced. Suggestion is for 9 in x 9in for the large house block or 6 in x 6 in block for the smaller ones. This normally helps control any stretch the embroidery hoop may cause in the fabric once the top is pieced. Ooops! I did mine when pieced with a 3 in hoop and did not have a problem with stretching. But do not leave your hoop in overnight or for long lengths of time or the fabric will stretch.
Choose the layout of your fabrics and cut per the diagram. Note I removed the seam in the upper Right hand corner and just made that piece the same size as the one below 2 1/2 x 4 1/2 in.
Hand drawn designs:
Note: I just drew a square/rectangle/box the same size as my block and drew the design inside. I have given the measurements for the snowflake and the bird can be found in the original pattern in the correct size. The wonky star and house/tree were drawn on free hand after folding the paper to find the center, so these pics may not be to scale and are for your guidance only. Feel free to use them or design your own.
Next you will trace the hand drawn designs onto your chosen fabric. It is best to fold the design in half both width wise and length wise to find the center. Now do the same with your fabric and finger press the folds. Match up the centers of the design and the fabric and then trace. This ensures your design will be centered.
 |
| My high tech lightbox ;) Tracing my design onto my fabric. I used the light coming in through my sliding glass door. |
 |
| Traced designs ready to go. Note I cut my pieces to size and hand stitched after pillow top was pieced. |
 |
| Traced snowflakes |
Handstitches: I used a Outline Stitch for the majority of my designs. There are a couple of Double French knots on the house (door knob and snow drops) and for the eye of the bird. The snowflakes on the house are a single straight stitch into the middle as are the little prongs on the large single snowflakes above. And the quilting outlining each block is done with a simple Running stitch.
Here is a great resource for stitches!! Sharon has pics showing how to do each step of the stitch and then one of the finished product
Sharon b's Dictionary of Stitches for Hand Embroidery and Needlework
http://inaminuteago.com/stitchindex.html Main index of stitches
http://inaminuteago.com/stitchdict/stitch/outline.html
http://inaminuteago.com/stitchdict/stitch/frenchknot.html
http://inaminuteago.com/stitchdict/stitch/running.html
Ok, now to start piecing! Lay out all your pieces according to the diagram. I started with the lower center/right. I pieced the the two top 3 in squares and then the bottom two 3 in squares. Then I joined them with the center seam. Press all seams open on the pillow top to reduce bulk. The top will have batting and then be quilted to add strength. Next add the 5 1/2 in blocks on either side of your 4 square patch.
Next sew the 2 1/2 x 8 middle pieces together. Press seam open. Now join that strip to your bottom unit.
Next piece the 3 rectangles in your top center together to form a unit. Do the same with the 3 rectangles on the upper right hand side. Now join the two units together to create one.
Next move to the far left side and join the 3 blocks. Add the 2 1/2 x 14 1/2 strip to these blocks.
Next sew your top center/right unit to the bottom center/right unit.
Next add your left sided unit to the your pieced center/right sided unit. You now have a complete pieced pillow top!
 |
| Pieced pillow top, Decorative blocks traced on. |
Next I completed my hand stittching on the large decorative blocks using a 3 in hoop.
 |
| Pieced pillow top with decorative blocks complete |
After your decorative hand stitching is complete in your larger blocks, it is time to add the batting. I used Warm and White and cut it to the size of my pillow top or a bit smaller.
 |
| Add backing before handstitching outline of each block |
Next it is time to baste in preparation for the quilting. I used safety pins. You may also use long basting stitches, or whatever your preferred method is.
 |
| Pin Basted |
Next I used the light grey Pearle Cotton and did a running stitch approximately 1/4 inch all the way around each block. Just to outline it. I did not mark it, some stitches are not perfectly straight, some are more or less than 1/4 in away from the seam. I like it that way as it gives it a bit of character and charm. It is
handmade :)
 |
| All hand stitching complete! |
 |
| Close up of stitching |
Now it is time to make your back. Since I used 1/4 yd pieces of fabric I had plenty left over to simply strip piece the back. You may choose to do this or use whatever method/fabric you prefer.
 |
| Pieced Pillow back |
Now, almost finished! Match and square up your backing and pillow front. Trim any excess. Next pin right sides together and stitch. Be sure to leave approx a 4-6in opening so that you can stuff your pillow! I used a 12 oz bag of Poly Fill from Wal-Mart ($3-4). I wasn't sure I was going to like this as originally I had planned on using a pillow form. But I like it! Nice density, soft yet fluffy. I used the majority of the bag. Be sure and push it down into the corners to give them shape.
And finally whipstitch closed the 4-6 in opening you had for stuffing your pillow and wha-la! One Very Merry Christmas Pillow. And you have a head start on your Holiday stitching!
 |
| Completed pillow, front shot |
 |
| Pieced back of pillow |
I hope you have enjoyed making this pillow. I did. I can see it in different fabrics too! It would be great in solids with different designs, maybe geometric. Or maybe sweet pastels for a baby gift with baby related designs.....have fun with it! I would love to see your completed project, email me a pic or a link to your pic!
Thanks again!
Ginny
Please note there are many ways to do many of the steps I have described here. If you have a preferred way that is different then mine, that is great. This is for guidance only and what worked for me :)
Edited to add link up buttons! Sorry guys I either forget to do this or the labels!
Linking up to: